You step off a curb in Quincy, land awkwardly during a weekend soccer game in Weymouth, or hit a soft patch of sand on Duxbury Beach and feel that sharp twist. A rolled ankle can seem minor at first, right up until walking the dog, climbing stairs, or getting through a workday turns into a limp. That’s usually the moment people start searching how to strengthen ankles after sprain and wondering whether they can handle it on their own.
The short answer is yes, some home exercises help. The more honest answer is that timing matters. The right exercise too early can irritate the injury, and the wrong progression too late can leave you with a weak, wobbly ankle that keeps giving way months later. Around the South Shore, I see this all the time in runners, parents coaching youth sports, and adults who just want to get back to beach walks, yard work, and pickup games without thinking about their ankle every step.
If you want a deeper educational breakdown of foot and ankle anatomy, healing stages, and rehab concepts, Highbar Health has more in-depth resources at highbarhealth.com. Here, the focus stays local and practical. This is the phased recovery plan I’d want a neighbor in Hanover, Plymouth, or Cohasset to follow after a sprain.
Table of Contents
- Rolled Your Ankle on the South Shore? What to Do First
- Phase 1 Restoring Gentle Motion and Waking Up the Muscles
- Phase 2 Building Foundational Ankle Strength
- Phase 3 Improving Your Balance and Proprioception
- Phase 4 Advanced Strengthening and Returning to Activity
- Your Local Ankle Sprain Recovery Partner on the South Shore
- Frequently Asked Questions About Ankle Sprain Recovery
Rolled Your Ankle on the South Shore? What to Do First
A fresh ankle sprain needs calm, not heroics. If you just rolled it on a trail, court, field, or uneven sidewalk, the first job is to protect the joint and settle down pain and swelling. That early response affects what your ankle can tolerate over the next several days.
Watch for signs that need medical evaluation
Some ankle injuries shouldn’t be managed with internet advice and a compression sleeve. Get checked promptly if you can’t put weight on the foot, the pain is severe, the swelling keeps climbing, the joint looks visibly deformed, or you have numbness, unusual discoloration, or pain higher up the leg.
You should also be cautious if the ankle feels unstable right away, if you heard a pop and now can’t control the joint well, or if symptoms are getting worse instead of gradually easing. Those cases may need imaging or a more specific diagnosis before you start strengthening.
Practical rule: If walking a few steps feels impossible, or the ankle looks dramatically different from the other side, stop guessing and get it examined.
In the first couple of days, protect the ankle
Use relative rest. That means don’t push through sharp pain, but don’t assume total bed rest is the answer either. Keep the ankle supported, use compression if it helps manage swelling, and keep it raised when you can.
Short periods of ice may help with comfort. So can a brace, wrap, or sturdy shoe instead of floppy footwear. Around the South Shore, one common mistake is trying to “test it out” too soon on errands, beach walks, or long work shifts. If the ankle swells more after activity, you did too much.
What not to do early on
There are three mistakes that slow people down:
- Skipping the rest window: If you start aggressive stretching or strengthening while swelling is still active, the ankle usually gets angrier.
- Doing nothing for too long: A week of complete shutdown often leads to stiffness and a delayed recovery.
- Returning to sport based on pain alone: Less pain doesn’t automatically mean the ankle is ready for cutting, jumping, or uneven ground.
A sprain is more than soreness. The ankle’s soft tissues, joint motion, and muscle control all take a hit. The first phase should create enough calm that you can move into gentle motion work without limping harder afterward.
A simple decision point
If symptoms are mild and improving, home exercises may be reasonable to start with. If you’re limping several days later, can’t trust the ankle, or you need to return to a sport or active job, a physical therapist can help you sort out what’s safe and what’s too much.
That’s especially true if you’ve sprained this ankle before. Repeat sprains often don’t come from bad luck. They come from an ankle that never got fully rebuilt.
Phase 1 Restoring Gentle Motion and Waking Up the Muscles
A lot of South Shore patients hit this phase when the ankle is calmer at rest, but walking still feels awkward. They can get around the house, yet a trip through Derby Street, a short dog walk in Hingham, or a few uneven steps in a parking lot still makes them guard the ankle.
That is the right time to restore motion and wake the muscles back up. The goal is simple. Help the joint move more normally without stirring up swelling again.

Start with easy seated motion
Seated drills are often the best first step because they let you move the ankle without asking it to support full body weight. That matters if the joint still feels stiff, hesitant, or sore first thing in the morning.
Try a few minutes of:
- Ankle alphabets: Sit with the leg supported and trace small letters with your toes. Keep the motion smooth.
- Ankle circles: Rotate both directions. Smaller controlled circles usually feel better than big ones.
- Pumps up and down: Gently pull the foot up, then point it down.
- Side-to-side motion: Move the foot inward and outward only within a comfortable range.
These drills are not about building strength yet. They reduce stiffness and help restore a cleaner walking pattern.
Add gentle muscle activation
Once those motions feel manageable, start light muscle work without moving the ankle much. Isometrics are a good fit here. You press into resistance, but the joint itself stays mostly still.
Use your hand, a wall, or another fixed surface and hold a gentle push in each direction:
- Pull the foot up into resistance.
- Press the foot down into resistance.
- Turn the foot inward into resistance.
- Push the foot outward into resistance.
Keep the effort mild to moderate. The point is to remind the muscles how to fire, not to test how tough you are.
This part gets overlooked, especially by active adults who are eager to get back to running, field sports, or long beach walks. If the ankle cannot tolerate basic activation, it is usually too early for loaded strengthening.
If pain or swelling clearly builds later that day, the dose was too high. Cut back and try a smaller range, lighter effort, or fewer reps.
Stretch gradually
As motion starts to return, calf flexibility becomes important. A tight calf can limit how far the shin moves over the foot, and that often shows up as a limp, a shortened stride, or a feeling that stairs are harder than they should be.
Go easy here. Gentle calf stretching can help, but forcing the ankle into a big stretch too early often irritates the joint. I usually tell people to look for a mild pull, not a sharp pinch in the front or outside of the ankle. If stretching makes the ankle feel more unstable afterward, pause and get it checked.
Signs you’re ready to move on
Phase 1 is doing its job when daily movement starts to look more natural again.
Look for these signs:
- Walking is less guarded: You are not limping heavily around the house or office.
- Basic tasks feel easier: Standing to cook, showering, and short errands are more comfortable.
- The ankle moves better: It feels less blocked or stiff.
- Light muscle work is tolerated: Gentle holds and motion drills do not cause a flare later.
Some ankles move through this stage fast. Others take longer, especially after a bad roll on uneven grass, sand, or a trail. If progress stalls, the ankle keeps feeling loose, or you have had repeat sprains before, that is a good time to see a physical therapist in Quincy, Hanover, or Plymouth. Early guidance can prevent the pattern where the pain fades, but the ankle never fully regains control.
Phase 2 Building Foundational Ankle Strength
A lot of South Shore runners, soccer players, and busy parents hit a frustrating point here. The ankle hurts less, walking is better, and it starts to feel tempting to test it on a jog along Duxbury Beach, a quick workout, or a full day on your feet in Quincy. This is also where many repeat sprains begin. The ankle feels improved before it is strong enough to handle a sudden cut, uneven ground, or a missed step off a curb.
What needs to come back now is force production and control. The muscles on the outside of the lower leg, especially the peroneals, help resist the rolling motion that caused the sprain in the first place. If they stay weak, the ankle often keeps that loose, unreliable feeling even after swelling and pain settle down.

Why the outside ankle muscles deserve attention
Peroneal weakness shows up in a very practical way. The ankle struggles with side-to-side control, especially during quick direction changes, uneven surfaces, or tired steps when fatigued.
I also like people to train both ankles during this phase. The injured side gets the focus, but the other side should not be ignored. In the clinic, that often gives people a better base when they return to walking hills, beach terrain, gym classes, or field sports around the South Shore.
The core strengthening exercises
Band resistance works well here because it loads the ankle without the impact of jumping or running. Body weight work still matters, especially once standing feels steady.
Band work in four directions
Move slowly and with control. Let the muscles do the work instead of snapping the foot back.
- Dorsiflexion: Pull the foot upward against the band.
- Plantarflexion: Press the foot downward as if pushing a gas pedal.
- Inversion: Turn the sole inward against resistance.
- Eversion: Push the foot outward against resistance. This deserves extra attention after a typical rollover sprain.
A good starting point is 2 to 3 sets of 10 to 12 reps, twice daily if the ankle tolerates it well. Lighter resistance with clean form usually beats a heavier band and sloppy motion.
Calf raises
Start with support from a counter, railing, or chair if needed. Use both feet first, then build toward better range, slower lowering, and eventually single-leg calf raises.
This exercise matters for more than calf strength. It helps restore push-off for walking, stairs, and getting back to recreational runs or long beach walks without that flat, cautious gait people often keep after a sprain.
Seated and standing heel control work
Seated heel lifts, controlled lowering, and gentle weight shifts are useful middle steps between band work and harder standing exercise. They fit well for someone getting back to long retail shifts, teaching, commuting, or regular walks around Plymouth waterfront areas and neighborhood sidewalks.
For older adults rebuilding a stable base after injury, some of the ideas in these balance exercises for seniors that improve lower-body control can also support this phase once basic strength work is going well.
Common mistake: People only train straight up and down. A sprained ankle also has to control side-to-side forces.
A practical weekly progression
Use a simple progression instead of guessing.
| Focus | What you’re looking for | How to progress |
|---|---|---|
| Band control | Smooth motion without sharp pain | Increase band resistance or add reps |
| Calf strength | Better push-off during walking | Move from double-leg to single-leg emphasis |
| Side stability | Less wobble during eversion work | Slow the lowering phase and improve control |
Progress does not need to be fancy. A thicker band, steadier form, a pause at end range, or a slower lowering phase can all make the exercise harder in the right way.
What tends to work best
Consistent loading over a few weeks gets better results than random exercise days followed by an early test run.
A strong Phase 2 plan usually includes:
- Training both sides: The injured ankle needs more work, but both ankles should stay involved.
- Extra attention to eversion: The outer ankle muscles often need more work than people expect.
- A regular schedule: Short, repeatable sessions beat occasional hard efforts.
- Pain-guided progress: Mild muscle fatigue is acceptable. Sharp pain, more swelling, or a next-day flare means the dose was too high.
People who want more structure often do better with guided rehab instead of guessing from the internet. One option is working with a PT at Peak Physical Therapy and Sports Performance, where therapists can check side-to-side strength, adjust resistance, and make sure the ankle is ready for the demands of daily life on the South Shore.
When to stay in this phase longer
Spend more time here if any of these are still true:
- You limp at normal walking speed
- Band eversion still feels weak or shaky
- Single-leg calf raises are limited or poorly controlled
- The ankle gets puffy after modest activity
That usually means the ankle is not ready for harder balance work or return-to-sport demands yet. Building strength now is what helps prevent the pattern I see all the time. The pain fades, activity comes back, and the ankle keeps giving way because the foundation never fully returned.
Phase 3 Improving Your Balance and Proprioception
The ankle can be stronger and still feel unreliable. That’s because a sprain affects more than muscle tissue. It can disrupt proprioception, which is your body’s sense of joint position and movement. In everyday language, it’s the reason an ankle can feel wobbly even after pain improves.
That wobble matters on the South Shore. Uneven grass at a youth field, sand transitions at the beach, crowded sidewalks in Quincy, and quick pivots in the driveway all challenge your ankle’s ability to react fast. Strength helps, but reaction and control keep you upright.
Why balance training belongs with strength training
Research comparing rehab approaches found that combined neuromuscular and strength training was the most effective option for chronic ankle instability, with an effect size of 2.82, compared with 1.36 for strength training alone and 1.05 for isolated neuromuscular training, and it had a 99.9% probability of being the optimal approach in the analysis, according to this study on combined neuromuscular and strength training.
That lines up with what we see clinically. If you only strengthen, you may still hesitate on uneven ground. If you only balance, you may not have enough force capacity to protect the ankle when life speeds up. The ankle needs both.
A progression that makes sense
Balance work should move from simple to challenging. If you jump straight to unstable surfaces and fancy drills, people usually compensate with the hip, grab onto furniture, or reinforce bad movement.
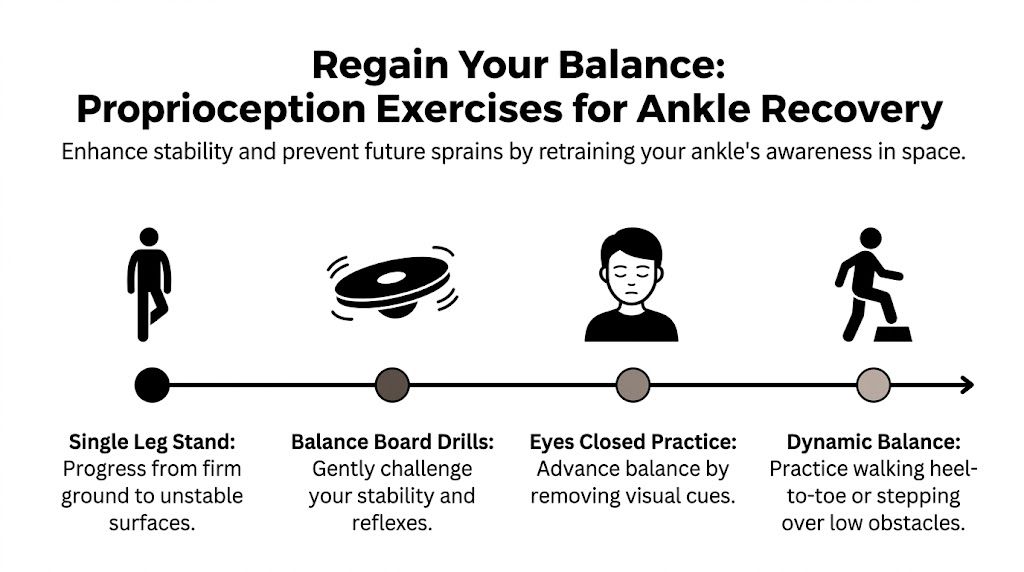
Start here:
- Single-leg stand on firm ground: Barefoot or in shoes, depending on comfort. Aim for steady posture.
- Head turns during single-leg standing: This challenges your system without changing the surface.
- Eyes closed work: Remove visual input and the ankle has to do more of the job.
- Soft surface standing: A folded towel, pad, or compliant surface can add difficulty.
- Dynamic stepping: Heel-to-toe walking, side stepping, or stepping over a low object.
For older adults or anyone feeling generally unsteady, these principles overlap with broader balance training. If that’s part of your picture, Peak’s guide to balance exercises for seniors is a helpful next read.
A strong ankle that can’t react is still vulnerable.
Ankle sprain recovery phases at a glance
| Phase | Typical Timeline | Primary Goal | Example Exercises |
|---|---|---|---|
| Early recovery | Early after symptoms begin settling | Calm irritation and restore motion | Ankle alphabets, pumps, gentle isometrics |
| Foundational strengthening | As movement becomes more comfortable | Build ankle muscle capacity | Band eversion, inversion, calf raises |
| Balance and control | After basic strength improves | Retrain stability and joint awareness | Single-leg stance, eyes closed balance, stepping drills |
| Return to activity | Later-stage progression | Prepare for higher demand movement | Hopping, lateral steps, controlled cutting |
The exact timeline varies. Your ankle doesn’t care what week it is. It cares whether it can handle the load you’re asking for.
What this phase should feel like
Balance practice should be challenging enough that you have to focus, but not so hard that every rep turns into a save. Small corrections are fine. Repeated loss of balance means the drill is too advanced.
A few signs you’re in the right range:
- You can recover from small wobbles without grabbing support
- The foot stays active instead of collapsing inward
- You feel more trust in the ankle during daily tasks
- Walking on mixed surfaces feels less tentative
Where people often go wrong
Some people skip balance work because it doesn’t feel as productive as band exercises. Others do it casually for a few seconds at a time and never progress it.
A better approach is to treat proprioception like strength training. Practice it consistently, increase the challenge gradually, and keep the drills connected to real life. If your goal is getting back to soccer, tennis, or trail walking, your balance work should eventually reflect those demands.
Phase 4 Advanced Strengthening and Returning to Activity
Many reinjuries occur when the ankle feels good enough for daily life, leading people to assume it’s ready for sport, running, jumping, or quick directional changes. Then the first hard plant tells a different story.
Returning to activity safely means preparing the ankle for speed, force, and unpredictability. Walking around Scituate Harbor and playing a fast pickup game in Braintree are not the same demand. A successful return has to close that gap.

Why eccentric work deserves special attention
Eccentric strengthening of the evertor muscles restores strength more effectively and provides superior long-term results compared to concentric training alone, and athletes who complete eccentric training achieve significantly greater strength, as described in this clinical summary on ankle evertor strengthening.
That matters because the evertors are part of your ankle’s defense system when the foot starts to roll. If they can’t control that motion under load, the ankle is more likely to fail when you cut, land, or react late.
What eccentric training looks like
Eccentric means the muscle is working as it lengthens. For the ankle, that often shows up in the lowering phase.
Examples include:
- Band eversion with slow return: Push the foot outward, then resist the pull back in slowly.
- Controlled heel drop work: Rise as appropriate, then lower with control.
- Lateral step-down patterns: The ankle and lower leg manage force as the body lowers.
The lowering portion is where people usually cheat. Slow it down. Control is the point.
Build back athletic movement step by step
Before you return to harder activity, your program should include movements that resemble the demands of your sport or routine.
A sensible progression might include:
- Lateral weight shifts and side stepping
- Small two-foot hops
- Single-leg landing practice
- Forward and lateral hopping
- Controlled cutting or change-of-direction drills
Those drills need clean landings. If the knee caves, the ankle rolls, or you avoid loading the injured side, your body is telling you the movement quality isn’t there yet.
Return-to-sport reminder: If you can do an exercise only while bracing, grimacing, and protecting the ankle, you’re not ready to build speed on top of it.
Shoes, surfaces, and real-world demands
A strong ankle still benefits from smart decisions. Supportive footwear can help during the return phase, especially for long walks, work shifts, or time on uneven ground. If that’s part of your challenge, this guide to shoes for ankle pain is worth reviewing.
Also pay attention to where you test your comeback. The treadmill, hardwood court, grass field, and beach sand all ask different things of the ankle. Start on the most predictable surface and earn your way back to the trickier ones.
Good return-to-activity questions
Before a full return, ask yourself:
- Can I hop and land without hesitation?
- Can I change direction without feeling the ankle give way?
- Can I complete the next day without extra swelling or pain?
- Can I trust the ankle, not just tolerate it?
If the answer is no to any of those, more rebuilding is usually the smart move. In such cases, a therapist’s eye is valuable. People often judge readiness by courage. The ankle judges readiness by capacity.
Your Local Ankle Sprain Recovery Partner on the South Shore
A home plan can get you started. It usually won’t tell you whether your ankle is still stiff in the joint, whether your calf is compensating, whether your balance strategy is poor, or whether you’re returning to activity with a movement pattern that sets you up for another sprain.
That’s why in-person rehab matters, especially if you’ve had repeat ankle injuries, persistent swelling, lingering instability, or a timeline that matters because of work, running, or sports. A physical therapist can match the plan to your actual presentation instead of giving you generic exercises that may or may not fit.
At Peak, ankle rehab may include hands-on joint mobilization to improve motion, soft tissue treatment for tight calf and peroneal muscles, dry needling when appropriate, guided strengthening progressions, and one-on-one coaching on balance, landing, and return-to-sport drills. That kind of support is useful whether you sprained your ankle during a soccer match in Weymouth, while running in Plymouth, or just stepping awkwardly off a porch in Hanover.
Care is available across the South Shore in Braintree, Quincy, Weymouth, Cohasset, Duxbury, East Bridgewater, Hanover, Kingston, Milton, Norwell, Pembroke, Plymouth, and Scituate. That makes it easier to stay consistent, which is a big part of getting a lasting result.
If your ankle still feels weak, wobbly, stiff, or unpredictable, don’t wait for the next sprain to confirm it wasn’t fully healed. Getting the ankle evaluated now is usually a lot easier than dealing with months of recurring issues later.
Frequently Asked Questions About Ankle Sprain Recovery
How long should I keep doing ankle strengthening exercises?
Longer than often realized. Once pain settles, many people stop rehab early and keep only the weakness that caused the problem in the first place. If your ankle still feels different from the other side during walking, stairs, balance, or calf raises, keep going. If walking itself still hurts, this guide on ankle pain when walking can help you think through next steps.
Should I wear a brace when I go back to activity?
Sometimes, yes. A brace can be a helpful short-term support while strength, balance, and confidence catch up. It shouldn’t replace rehab. If you feel like you can function only when tightly braced, that usually means the ankle still needs more work.
When should I see a physical therapist instead of doing this on my own?
A few situations stand out. Get professional help if the ankle keeps swelling, feels unstable, isn’t improving steadily, or has been sprained before. You should also get checked if you need to return to running, court sports, field sports, or an active job and you’re not sure the ankle is ready.
If you’re dealing with a sprained ankle anywhere on the South Shore, Peak Physical Therapy and Sports Performance can help you build a plan that matches your injury, your goals, and your schedule. Book an appointment at a nearby clinic and get back to walking, running, and playing with more confidence.