You step off a curb in Quincy, land awkwardly, and feel that sharp roll on the outside of your ankle. Or maybe it happened chasing a loose ball at a youth game in Pembroke, jogging along the beach in Duxbury, or coming down the stairs too quickly at home. A few minutes later, the ankle is swelling, walking feels shaky, and the big question hits fast: should you rest it, push through it, or get it checked?
That uncertainty is what trips people up. A lot of South Shore residents do the same two things after an ankle sprain. They either do too little for too long, or too much too soon. Both can drag out recovery.
The better approach is a staged one. The right ankle sprain recovery exercises depend on where you are in the healing process, what movements you can control, and what you need to get back to, whether that's walking Plymouth comfortably, coaching on the field in Braintree, or returning to weekend basketball and beach runs. If you're looking for more local guidance on foot and ankle care, Peak has a useful overview of foot and ankle physical therapy on the South Shore.
Table of Contents
- Your Guide to Ankle Sprain Recovery on the South Shore
- The First 72 Hours What to Do Right After an Ankle Sprain
- Phase 1 Gentle Movement for Early Healing
- Phase 2 Building Foundational Strength and Stability
- Phase 3 Restoring Balance and Proprioception
- Phase 4 Returning to Sports and South Shore Activities
Your Guide to Ankle Sprain Recovery on the South Shore
An ankle sprain seems simple until it lingers. The swelling improves, the bruising fades, but the ankle still feels unreliable when you pivot, step on uneven ground, or move quickly. That's when many people realize the injury isn't just about pain. It's about restoring motion, strength, balance, and confidence in the right order.
On the South Shore, that matters more than people think. Daily life here isn't always flat, predictable ground. Side streets, sandy paths, slick docks, youth fields, and long days on your feet all challenge a healing ankle. A recovery plan has to match those real demands.
What good rehab looks like
A useful rehab plan does a few things well:
- It matches the phase of healing. Early work should calm things down and restore motion. Later work should build strength and control.
- It respects trade-offs. If you rush into hopping before you can control a simple heel raise or stand steadily on one leg, the ankle often compensates.
- It gives you a clear progression. You should know when to stay with an exercise, when to advance it, and when to get help.
Practical rule: The best exercise is the one your ankle can tolerate with good control today, not the hardest one you saw online.
What usually delays recovery
The most common mistakes are predictable:
- Too much rest: prolonged inactivity can leave the ankle stiff and weak.
- Too much intensity: aggressive stretching, running, or jumping too early can stir things back up.
- Skipping balance work: many people stop once walking feels better, even though instability often shows up later.
If your ankle still feels swollen, weak, or unsteady after those first few days, a structured plan makes a big difference. In clinic, the work is usually straightforward. Regain motion first. Add strength next. Rebuild balance. Then test higher-level activity before you trust the ankle fully.
The First 72 Hours What to Do Right After an Ankle Sprain
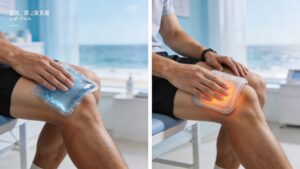
Those first few days set the tone. The old advice was often just “rest and ice it.” That's too limited. A better frame is PEACE & LOVE, which focuses on protecting the ankle early, then adding movement and load as symptoms allow.

What helps early and what usually backfires
Right after a sprain, think calm support, not complete shutdown.
- Protect the ankle: avoid movements that sharply increase pain.
- Raise and compress: both can help you manage swelling.
- Use pain as a guide: gentle loading is useful when it doesn't aggravate symptoms.
- Start learning early: knowing what to do lowers panic and helps you avoid the common “all rest” or “all gas” mistake.
A lot of parents and coaches on the South Shore keep first aid supplies in the car or team bag. If you're involved with field sports, these FA-approved soccer first aid contents give a practical sense of what belongs in a basic sideline setup for ankle and lower-leg injuries.
For swelling control at home, the details matter. Wraps that are too loose don't do much, and wraps that are too tight can make the foot feel worse. This guide on how to reduce swelling is a solid local resource if your ankle is puffing up fast after injury.
Early care should make the ankle feel safer and more settled. It shouldn't leave you more stiff, more guarded, or more afraid to move.
Red flags that need medical evaluation
Most ankle sprains can begin with home care and a prompt PT evaluation, but some symptoms need medical attention first.
| Symptom (What to look for) | Action (Where to go) |
|---|---|
| You can't bear weight at all | Go to urgent care or the ER for evaluation |
| You have marked deformity | Go to the ER immediately |
| Pain is severe and escalating instead of settling | Seek urgent medical assessment |
| Numbness, unusual color change, or a cold foot | Go to the ER immediately |
| Pain is concentrated over bone rather than soft tissue | Get medical imaging guidance through urgent care or your physician |
If none of those red flags are present, the usual next step is simple. Protect the ankle, control swelling, begin gentle pain-free movement when tolerated, and book an evaluation if the ankle feels unstable or you're unsure how to progress.
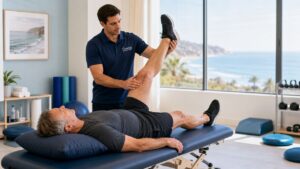
Phase 1 Gentle Movement for Early Healing
Once the ankle has settled from the immediate injury, the next job is restoring motion without stirring up the joint. At this stage, many people either stay too passive or push too hard. Neither works well.
Early rehab has long emphasized range-of-motion, isometric, and isotonic strengthening rather than prolonged rest, and a classic review notes that Achilles tendon stretching should begin within 48 to 72 hours of injury because tissues can tighten quickly after trauma. That same review is available through the rehabilitation literature on ankle sprain recovery.
Why early motion matters
The point of this phase isn't to “work through” pain. It's to keep the ankle from getting stiff and guarded.
When people rest too long, the joint often loses smooth movement. Calf tightness builds, walking mechanics change, and then every later phase becomes harder. Gentle movement helps restore the ankle's normal rhythm.
That's especially noticeable in everyday South Shore routines. If you're hobbling through the grocery store in Hanover or taking short, guarded steps around work in Weymouth, your body starts building compensation patterns quickly.
Simple exercises to start with
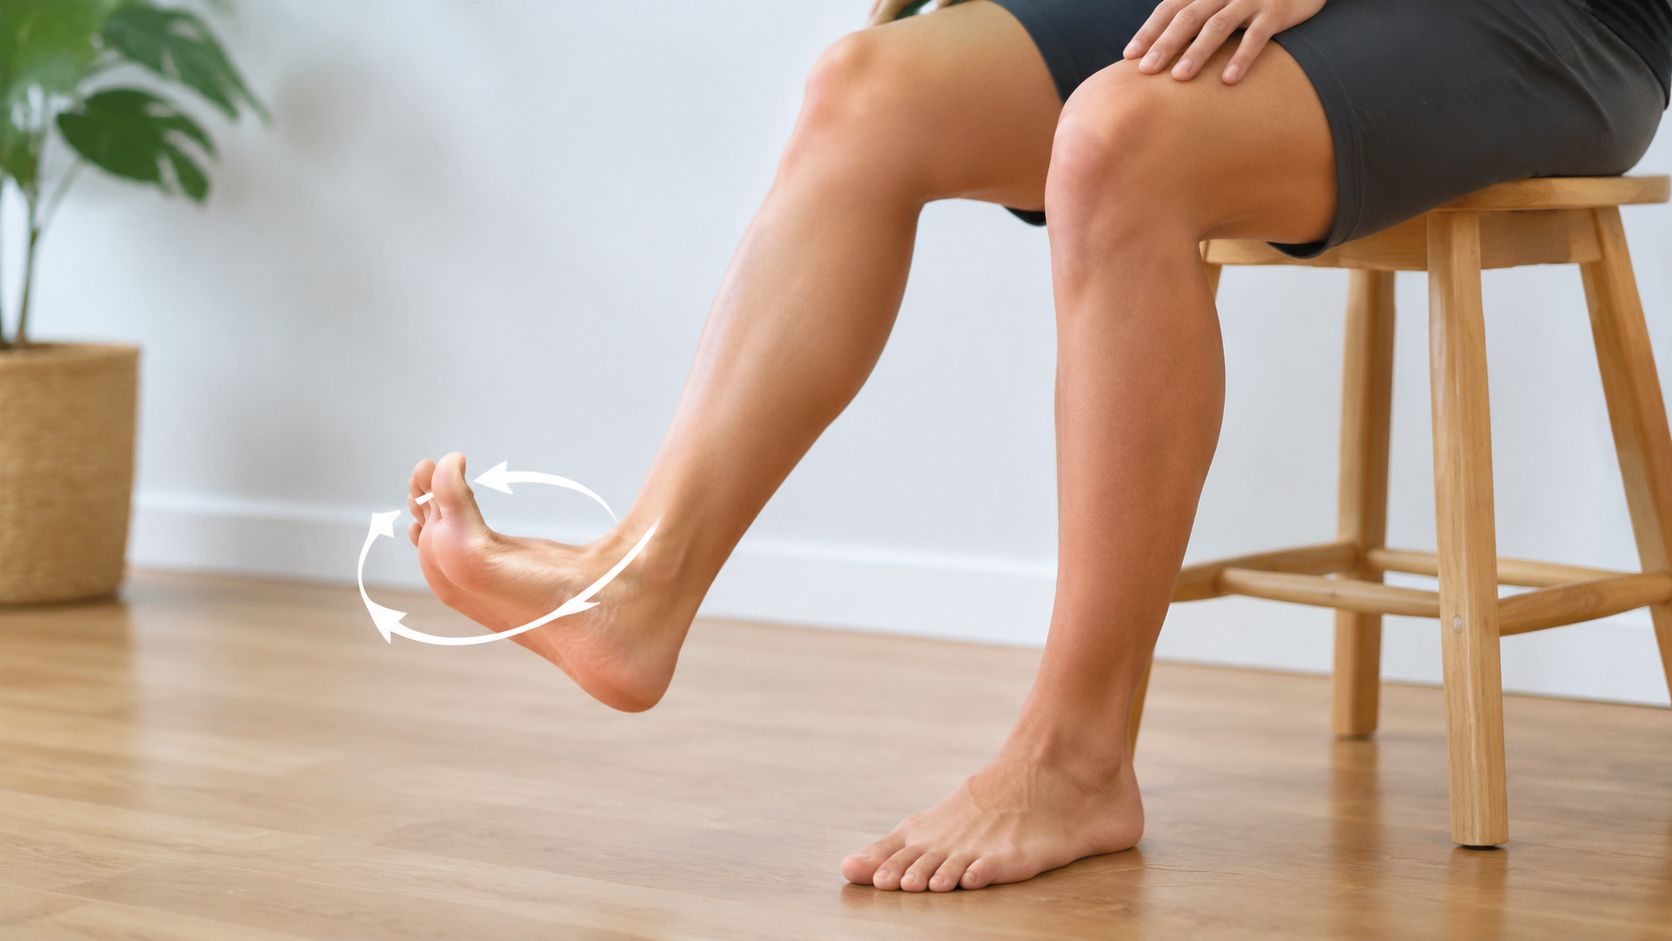
Use movements that feel controlled and tolerable:
- Ankle pumps: point the foot down, then pull it up slowly.
- Ankle circles: make small circles both directions, staying smooth rather than forcing range.
- Alphabet tracing: write letters in the air with your foot to create varied motion.
- Gentle calf or towel stretch: aim for a mild stretch, not a strain.
A helpful way to think about this phase is “motion without drama.” The ankle should feel used, not challenged.
Keep the movement small if needed. Smooth, repeatable motion beats forcing a bigger range.
If a stretch leaves you limping more afterward, back off. If ankle circles feel easy and walking is getting cleaner, you're likely ready to keep progressing. This phase is also a good time to begin light muscle activation around the ankle without aggressive resistance.
Phase 2 Building Foundational Strength and Stability
Once motion improves and the ankle tolerates normal walking better, strength becomes the main priority. At this stage, the ankle stops being merely “less painful” and starts becoming dependable again.
A lot of home programs underdose this phase. People do a few random band pulls, maybe some calf raises, then jump straight to sport. That leaves the ankle underprepared for stairs, uneven ground, and quick changes of direction.
The muscles that need attention
The ankle needs more than generic “leg strength.” It needs control in all directions.
A classic rehabilitation review recommends resistive exercises in all four ankle directions at 2 to 3 sets of 10 to 12 repetitions twice a day, with special attention to the peroneal muscles, since weakness there is associated with chronic ankle instability and recurrent injury. Harvard's clinical guidance also recommends 20 to 30 calf-raise repetitions, 30 repetitions for banded ankle motions, and calf stretches held for 15 to 20 seconds in recovery work, as described in Harvard's ankle sprain exercise guidance.
A practical home strength circuit
Try a structured sequence rather than scattered exercises:
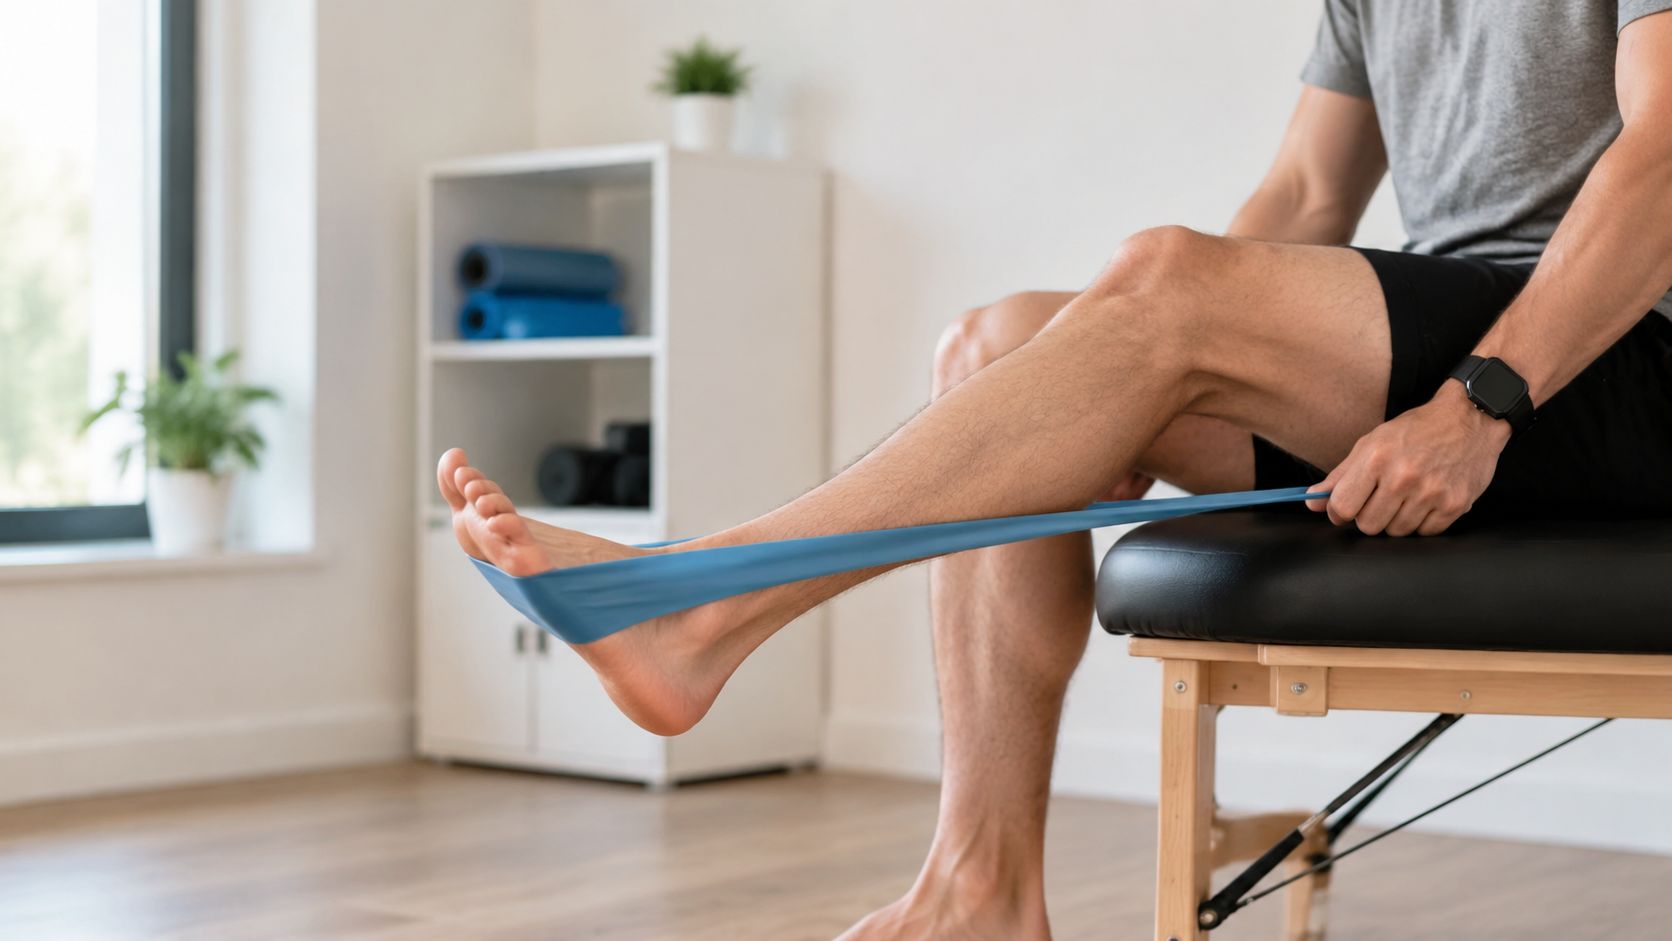
Banded dorsiflexion and plantarflexion
Pull the foot up against the band, then press it down with control.Banded inversion and eversion
Move the foot inward and outward slowly. Don't let the knee rotate to cheat the motion.Calf raises
Start with two legs. Rise evenly, pause at the top, lower with control.Towel scrunches or foot control work
These help rebuild foot and ankle coordination, especially after a period of guarded walking.Calf stretching
Keep the stretch gentle and consistent.
Here's the trade-off I see often. People love the exercises that feel athletic, but they skip the slower band work because it feels too basic. The “basic” work is usually what gives the ankle enough strength to handle the more athletic work later.
If you're recovering with guidance, one option for a structured progression is Peak Physical Therapy and Sports Performance, where ankle rehab commonly includes graded strengthening, balance work, and return-to-activity progressions based on what the ankle can control.
Phase 3 Restoring Balance and Proprioception
This is the phase many people miss. The ankle may feel pretty good walking in a straight line, but it still reacts late when the ground changes under you. That delayed response is a big reason people say, “It doesn't really hurt. It just feels unstable.”
Why the ankle still feels off after pain settles down
A sprain affects more than ligament tissue. It also disrupts the ankle's sense of position and timing. That's proprioception. If it's off, the muscles around the joint don't react as cleanly when you shift, pivot, or land.
That's why someone can feel fine on level ground but hesitate on sand, grass, or a sloped driveway. Around the South Shore, that shows up fast on beach paths, uneven yards, and crowded sidelines.
If your ankle feels wobbly but not especially painful, don't ignore that. Instability is its own problem.
Progressions that fit real life on the South Shore
Start simple and progress only when the exercise looks controlled:
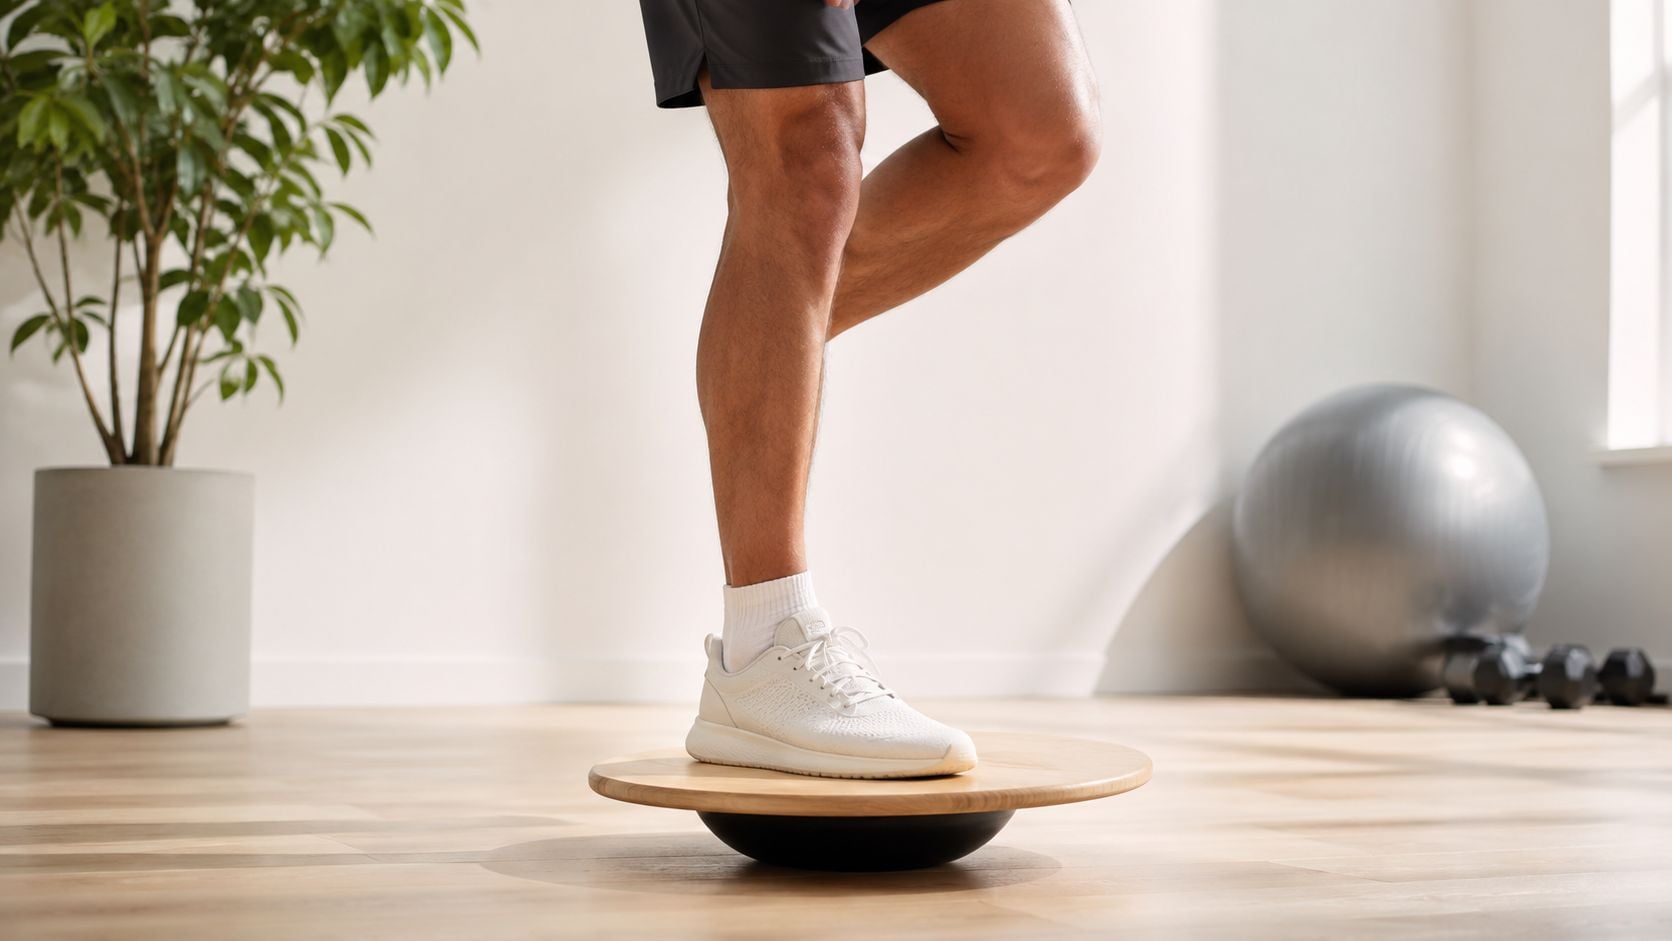
- Single-leg stance on the floor: stand tall and keep the pelvis level.
- Single-leg stance with head turns or light reaching: add a small challenge without losing posture.
- Standing on a folded towel or pillow: this mimics the unpredictable feel of softer ground.
- Balance board or controlled unstable-surface work: useful once basic single-leg control is clean.
The goal isn't to survive the drill. The goal is to look steady doing it.
For someone who wants to get back to long walks near the water in Scituate or beach days in Duxbury, this phase matters as much as strength. Sand, sloped surfaces, and quick direction changes expose whatever control the ankle still lacks. If you can't own a simple single-leg stand, the ankle isn't ready for higher-speed tasks.
Phase 4 Returning to Sports and South Shore Activities
Impatience often causes trouble. A lot of active adults get to the point where the ankle doesn't hurt much and assume they're done. They aren't.
The problem is that symptom reduction alone is not enough for a full recovery. Higher-level rehab uses balance and hop-based work because lingering neuromuscular deficits can remain after pain improves, and return to sport should be based on performance, not just the absence of pain, as described in this return-to-sport ankle rehab discussion. That's the difference between feeling okay and being ready.
Pain-free is not the finish line
If your goal is more than ordinary walking, the ankle has to prove it can handle speed, impact, and unpredictability.
That means building toward tasks like:
- Small forward and lateral hops
- Skipping and controlled bounding
- Figure-8 running
- Cutting and deceleration drills
- Single-leg squat control
- Jump-landing practice
The sequence matters. If you start hopping before you can control heel raises and stand comfortably on one leg, your body usually finds a workaround. The knee caves in, the trunk shifts, or the ankle stiffens. That's not a clean return.
Signs you may be ready to progress
Before returning to beach running, pickup basketball, adult league soccer, or youth coaching sessions that keep you moving, look for signs of real readiness:
- You can perform strength work with symmetry and control
- Single-leg standing feels steady, not shaky
- Landing mechanics look clean
- Direction changes don't create hesitation
- The ankle recovers well after activity instead of flaring up later
For athletes and active adults, this is often where formal testing helps. A guided progression in sports physical therapy on the South Shore can make the jump from rehab exercises to real activity much safer, especially if your ankle has been sprained before.
For a deeper educational breakdown of lower-body injury recovery, anatomy, and rehab principles, visit the broader resources at Highbar Health.
If your ankle still feels stiff, weak, or unreliable, the next step is to get it assessed in person. Peak Physical Therapy and Sports Performance has clinics across the South Shore, including Braintree, Quincy, Weymouth, Cohasset, Duxbury, East Bridgewater, Hanover, Kingston, Milton, Norwell, Pembroke, Plymouth, and Scituate. Book an appointment and get a clear, phase-based plan to help you return to walking, work, sports, and everyday South Shore life with confidence.